
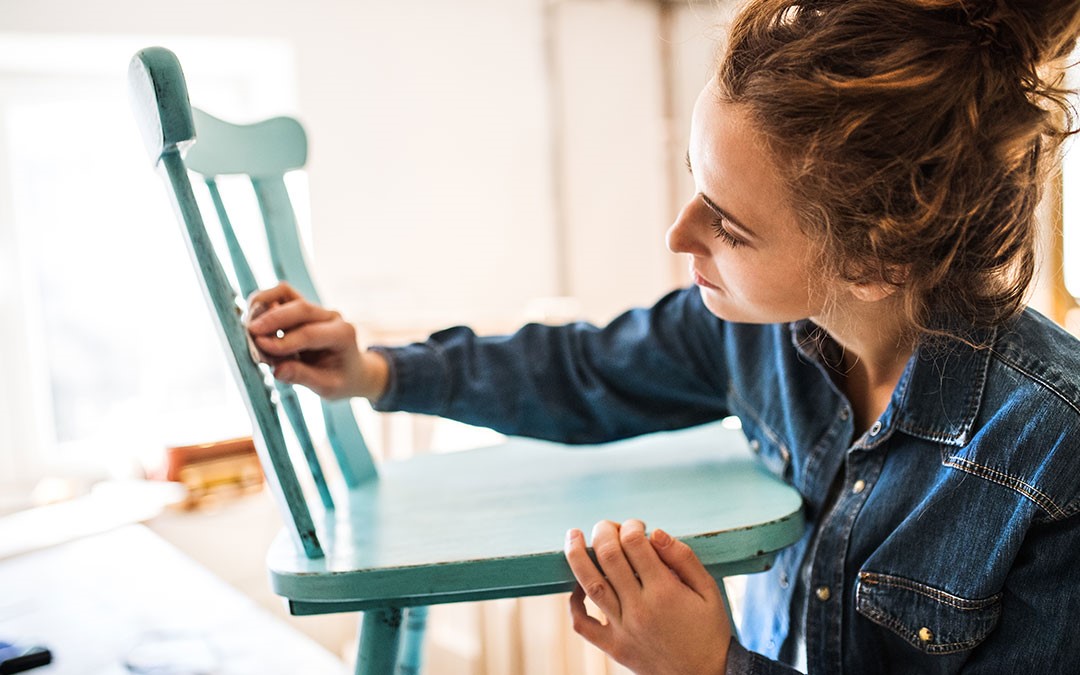
Some of us cannot afford to just go out and buy a new piece of furniture if the old one isn’t in its best shape. So, what can we do to make it look good? Well, painting is one good option. The furniture gets a new life and new impression, even if it’s very old.
However, painting furniture isn’t easy. And you are not a professional. There are things that we have to be very careful about while painting a piece of furniture, like good quality paint, perfect strokes, and cleanliness. A bad paint job can worsen the condition of the furniture than make it look good.
Below is a furniture-painting guide that will help you retain your furniture’s elegance back.
Things You Will Need
Before you open that can of paint you’ve been saving for that chair, there are some other important things you need to make sure that you have.
You must have a scraper tool, tack cloth, palm sander & pads, nylon bristle brush, drop cloth, sandpaper, oil-based spray-on primer and sealant, oil paint, or Annie Sloan Chalk Paint, and safety gear.
Now that you have these things, let’s start with the steps.
Steps to Paint Wood Furniture
Step 1: Check for Lead
A lot of old furniture was painted with lead-based paint. So, if you are repainting a piece of old furniture, you better check if it was previously painted with lead paint before you remove it. Since the lead test is dangerous (it can cause multiple diseases and even death), it is better to be safe than sorry.
Lead kits are available easily in superstores. If the lead test results in negative, follow the steps below.
Step 2: Remove the Paint
To do a new paint job, it is important to remove the previous one. Use a scraper to remove the loose paint by holding it against the furniture and rubbing it with pressure.
Step 3: Remove doors, handles, and drawers
If the furniture has doors, drawers, and handles, it is time to remove them to make the process easy. If the furniture is detached, the steps below will apply to all the pieces of the furniture.
Step 4: Sanding
Sanding is a process where the furniture gets a smooth surface so the paint settles easily and looks good. For sanding, use a palm sander to even out the furniture’s surface. Then, use sandpaper to sand it. It is better to sand in a direction of the grain of the wood.
The crevices of the furniture might be hard to reach during overall sanding or with a palm sander, so you may need to hand-sand those areas, especially if you are sanding furniture with emboss design.
When done, wipe the furniture with a tack cloth.
Step 5: Apply Primer
Spray primer might be a bit expensive than basket primer, but it is cost-effective. That is because it gives neat and even coverage. A basket cannot do that because you are not a professional. If your paint is of dark color, use a darker prime; and white primer for light-colored paint.
Begin applying primer with the underside of the furniture. Be consistent with the spray patterns by doing it slowly; don’t rush it to avoid overspray and drips.
Along the natural wood pattern of the furniture, do back and forth spraying. Coat the furniture with primer twice or thrice, depending on the standard of coat, and leave it to dry after each coat.
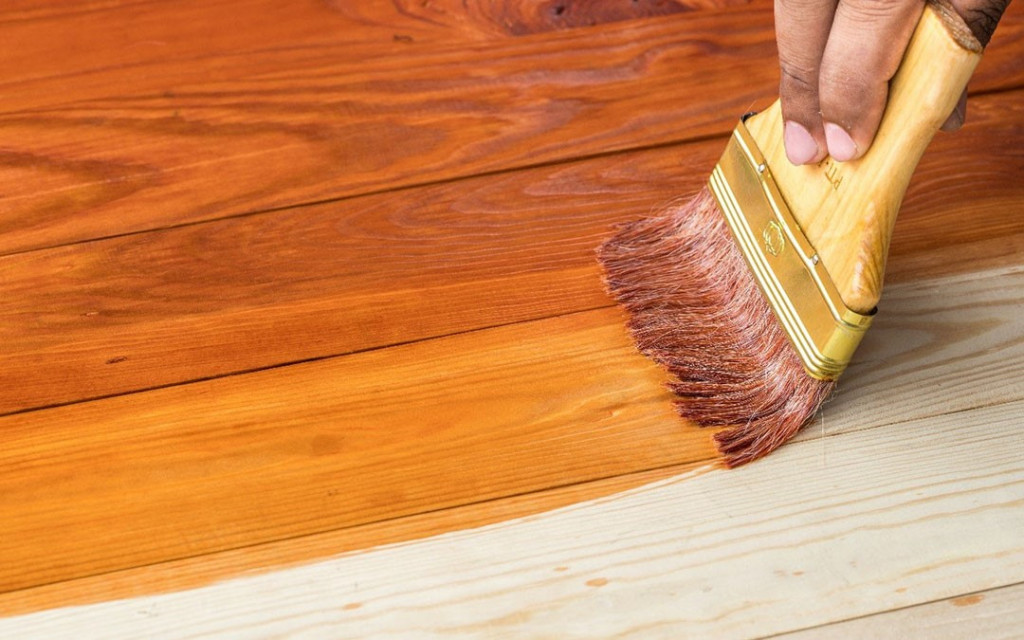
Step 6: Paint
You might need to sand the furniture again with sandpaper to remove dust and even it out more. After that, start with the paint. Apply the paint with smooth and nice strokes along the natural wood pattern lines of the furniture.
Make sure to use a good-quality nylon bristle brush. Be back and forth with the strokes to get a proper finish. If the paint drips, stroke the brush lightly over it to merge it with the rest of the paint. Apply the paint coat twice or thrice, leaving it to dry after each application.
Step 7: Clear Coat
After the paint is fully dried, apply the clear coat. A clear polyurethane coat is responsible to provide a sheen layer, which not only makes it look new and impressionable but also protects the paint. hold the spray can at least 10 inches away from the furniture and spray it in the back and forth motion as you did with the primer.
After the first clear coat, let it dry. Use sandpaper if necessary to give a professional-looking finish before you coat it for the final time.


