
It’s a hot day, and you need a chilled drink. You head to the ice maker and notice that what you dispense is cloudy and contains foreign particles. So you decide to get some water from the refrigerator’s dispenser, only to realize it smells terrible and tastes even worse.
These are some of the tell-tale signs that it’s time to change the water filter in your refrigerator. Filterway offers a wide range of fridge replacement water filters, and a simple search query on the website presents you with the best-suited cartridge for your model.
However, you should note that smelly and distasteful contents in your cup are not the only things that call for an immediate replacement. For example, if your dispenser is suddenly working slower than usual (indicating a blockage), the warning light has come on, or you have used the cartridge for more than half a year, you need to swap the old cartridge with a new one.
Manufacturing brands recommend regular changing, at least biannually or after dispensing between 300 to 400 gallons. So, how do you go about it?
Here are tips to help you switch your cartridges with no hassle.
Let us delve into the specifics.
Confirm compatibility
With the unending list of cartridges in the market, it’s not uncommon for people to purchase an incompatible one. So, before you purchase, ascertain that it is well-suited for your appliance.
You must know your refrigerator’s model. You can track this number by looking at the manufacturer’s sticker, usually stuck on the inside of the appliance. The user manual also contains this number. Once you log onto Filterway, you will input it into a search bar and initiate a query. The website will present you with the appropriate cartridge for your fridge in a few seconds.
Find the cartridge
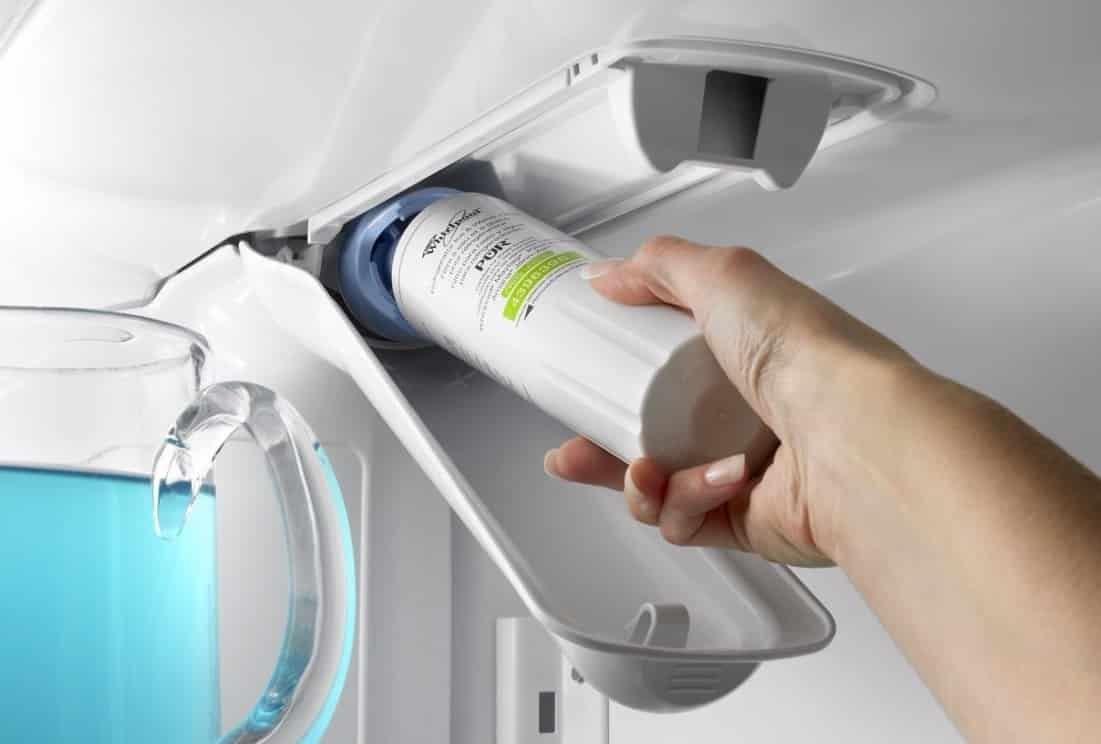
Next, you need to find the old cartridge. Its placement will largely depend on your appliance’s model.
Most cartridges are placed inside the fridge, in the top right corner. However, some models will have exterior cartridges that are placed below the freezer – usually in the grille.
Shut off the water supply
To avoid significant spillage, shut off your main water supply. However, this process is not needed for many models as their systems automatically cut off supply once you uninstall the cartridge.
Dislodge the cartridge from its compartment
The unmounting process varies from one appliance to the other.
For interior cartridges, you need first to open the housing. Press the housing’s lock inwards and downwards. Once you expose the cartridge, hold it firmly with your right hand and twist it towards your left. Do not try to yank it out.
For exterior cartridges, you only need to grab their handle, rotate counterclockwise, and pull it out. However, various models come with a push button that instantly dislodges it from its compartment when pressed.
Even with no water supply, you can expect some water to spill during this process. So, it does help to have a towel or rug in hand.
Mount the new cartridge
Once you have removed the worn-out cartridge, you need to insert the new one.
Screw the cartridge in place by placing it into its housing and twisting it towards your right (clockwise) until it locks into place.
The process is slightly different for external cartridges with a push button. In this case, you need to push it into its compartment until it clicks into place.
However, for most external filters, you might need to remove the cap from the old cartridge and place it on the new one before installing.
Clean out the system
Dispense 3 to 4 gallons to rid the system of any loose particles and air bubbles. And if you haven’t used it for a few days or more, this process will also help to sanitize the system.
Reset the indicator if your fridge has one.
Wrapping up
Regularly changing your cartridge is one of the best ways to enjoy water that is free from debris and illness-causing pathogens. If you have installation problems, you can always refer to the replacement instructions on your appliance or cartridge datasheet.


