
You do not need to be a carpenter or a remodeler for you to have skills of timber fencing. In this article, we will give you steps on how to build your timber fence. Because most people erect fences for many reasons but the main reason for building timber fences is for privacy to your yard.
When starting to build a timber fence. First, make sure you go and check your local codes and regulations and have your lot surveyed to find your property line. Make sure your timber fence is within your property line. Now you can layout all your underground lines. When wood fences components are built like that. It means the pickets and boards can be put on piece by piece. This allows the fence to follow the contour of the land.
Normally shadowbox fences alternate pickets on each side so that you can be able to see through at an angle for complete privacy. However, attach the pickets tight together on just one side no matter what fence style you pick make sure you start your layout with string and a batter board.
Batter boards are just made out of furring strips and it will allow you to move your string line back and forth. Just eyeball off the house thereafter. Because you want to make sure your string line is six inches off of your property line. Take your tape measure six inches from your property line. Tie a knot with another string from your house to the batter where your fence will be. Continue running the string around the whole fence layout.
When you are laying out the size to get the best appearance to try to get full pickets at the corners and also useful pickets on the gate adjust the post spacing so the boards will be flush to in the inside of the entryway for your five and a half-inch boards they will overlap one inch so the boards will be spaced three and a half inches between. Once you have your fence line established you can start making out your spacing for your post holes. Have an eight-foot gate going in there. Make sure your tape measure is level do not follow the slope of the ground. When you are setting your stake, you want to make sure you are half the width of the posts away from your line.
That way when the post goes in it will be flush with your string. Now you can continue down the line. Typical post spacing is between six and eight feet once you are done setting your stakes you can mark the lines on your batter boards then remove your lines. So that it makes it easier for you to dig holes. When setting your posts make sure they are just below the frost line and your hole should be three times the thickness of your posts. You can use a shovel and a post hole digger especially when you are digging near the house.
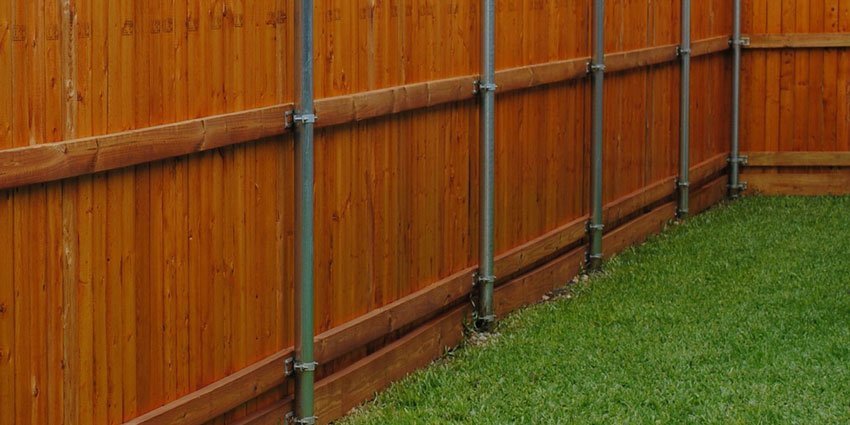
When you are done digging the holes you can start setting your posts. And do not forget to string up your line to make sure your posts are straight and tie the string on the batter board right over the marks you made, you want to make sure your timber fence will be straight. Then start with about six inches of dry concrete in the bottom of the hole. Set the posts in the hole and make sure it’s plumb will hold it in in place with braces. Make sure you mix the concrete according to the manufacturer’s directions. After mixing the concrete, fill it around the posts. And keep it a couple of inches below ground level and make sure you slope it away from the post.
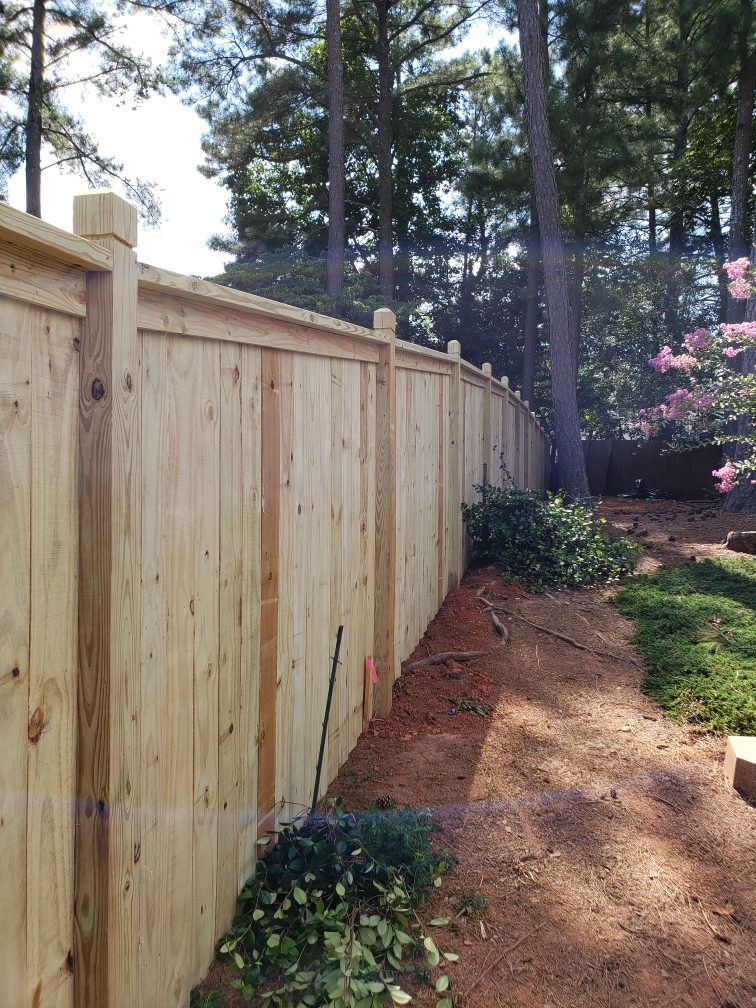
Once you have set all your posts and cleared your concrete. Then you can start taking off your batter boards. And start attaching have erected. Make sure your rails are on the outside of your posts instead of in-between it will add stability on your fence. After you have installed the rails and posts cut you can now start installing pickets. And when installing pickets make sure you use a spacer and a two by four is nice with a two by four block on the back and that allows you to sit on the top rail and have equal spacing between your pickets so that it may stay in place. And when installing the pickets do not forget to use the spacer at the bottom as well. You can use nails, staples, or screws as long as they are rated for pressure-treated material.
And make sure you use a level frequently to make sure the pickets are plump. At the level part of your yard, you can string a string line for the tops of your pickets and tie a string on every corner to make sure the tops are aligned. Now you can install pickets on the inside of your fence. Align the tops of your pickets and once you are done installing your pickets. You can start building your gate.
And just like any other gate, you can build a square frame out of two by fours using a gate building kit. First, install the frame then put the pickets on following the contour of the land. One important thing you need to remember is to take into account your hinge spacing and your latch spacing. For example, a half an inch give it another quarter of an inch or so for your latch. Using a gate building kit makes the project easier and also prevents the gate from sagging over time. So cut your middle brace to find the middle of your frame. And after you are done building your gate, you can go hang it. And when hanging it makes holes and pre-drill up. And you can finish by installing the pickets and use the string line as a guide. After you are done building your timber fence, wait a few months before sanding or painting. Now you will have a new timber fence and a new look for your backyard.
Article kindly provided by Melbourne Fencing Pros of Melbourne, Australia.


