
Owning a new cellular weather station is equal parts exciting and daunting. It’s exciting because you finally get to experience its benefits, and it’s daunting because it can be complicated to install.
Nevertheless, you should always make sure your weather station is installed in the right location. Although the device comes with an instruction manual, not everything is covered there. You could still end up placing your weather station under a tree, in an alley, or under an overhang where it isn’t as effective.
Today, we’ll be discussing how to properly set up your personal weather station so that it gets a good “fetch” and is able to better serve its purpose.
Personal Weather Station Installation Guide
In order for a cellular weather station to report accurate information, it needs to be set up in a good location. You need to do some careful “siting,” which is the process of deciding where and how to install your device.
Siting
The be-all and end-all of any weather station installation project, “siting” ensures that the readings coming from your device are the most accurate. In fact, it proves to be a more influential factor in determining readings than the quality of the weather instrument itself.
Temperature
As far as these smart home gadgets are concerned, errors typically have to do with thermometer sensor misplacement, which affects the temperature. Now, in this case, you will need to refer to temperature as meteorologists define it, which is: The temperature in a shaded area with sufficient ventilation.
Going by this information, you must place your weather station in an area where its thermometer sensor:
- Never gets direct sunlight
- Receives proper ventilation
- Is at least five feet above the rooftop when placed on the roof
- Is at least five feet above the surface of the grass when placed above grass
- Is at least 50 feet from the nearest pavement
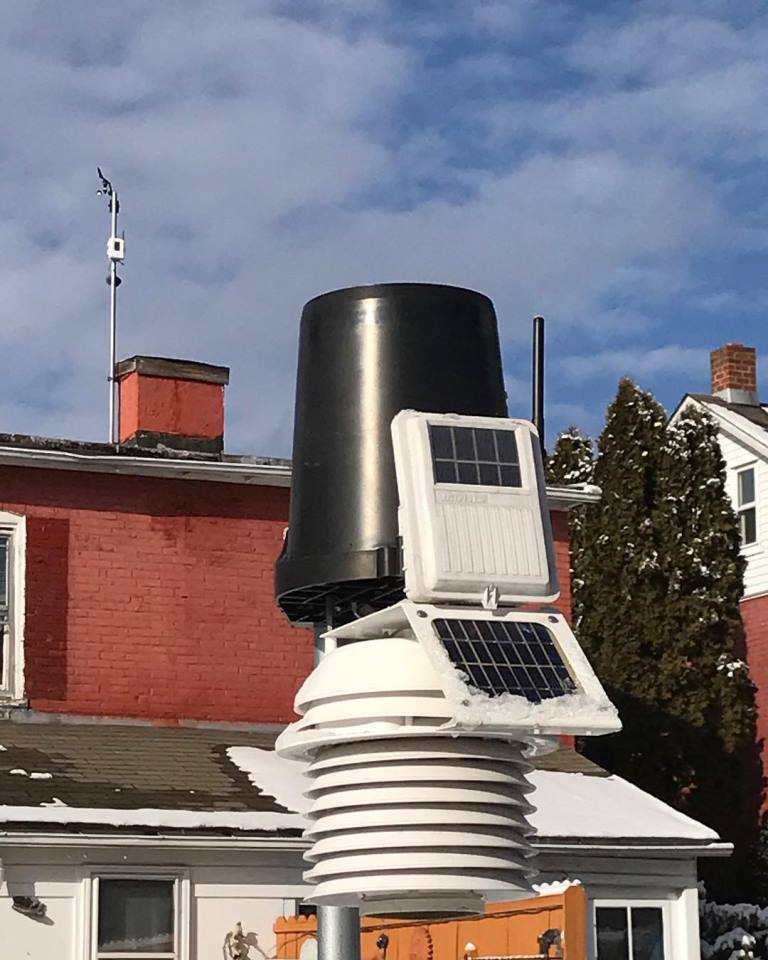
It is also recommended that you use a radiation shield for your thermometer sensor. In this way, your weather station can be positioned under direct sunlight with its sensor contained and protected within the radiation shield.
Consider radiation shields that have built-in fans called aspirators. These help ventilate the thermometer. Aspirators prove especially useful during hot and still days, too.
If money is an issue, instead of purchasing a radiation shield, you can mount a sheet of aluminum six inches from the sensor. This sheet should help shield the thermometer from sunlight and offer it plenty of ventilation, as well.
Humidity
Measuring humidity is also a critical step in installing a personal weather station. Make sure your humidity measurements are accurate and reflect the general atmosphere specific to your location.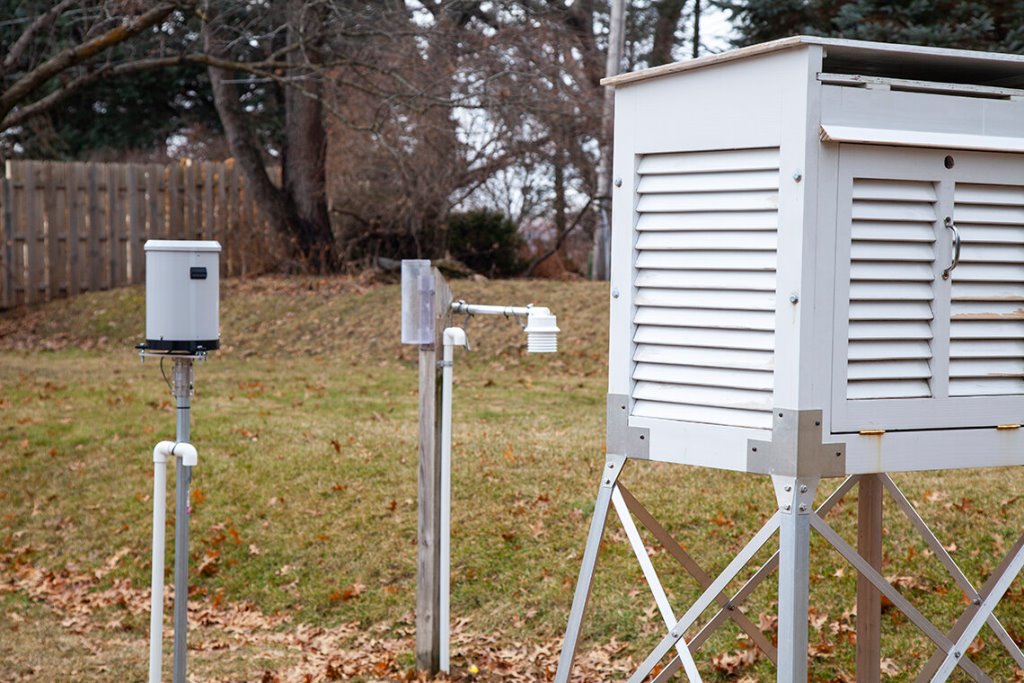
Remember that bodies of water, as well as plants, influence the level of humidity in a particular area. As a result, you need to position the humidity sensor at least 50 feet away from the nearest body of water or vegetation.
Rain Gauge
For the rain gauge or rain collector, you’ll want to make sure it is able to collect rainfall as if it was situated in a large, open field. The presence of nearby buildings won’t do this specific function any good because they create “shadows.”
For example, if there’s a building to the east nearby and rain is accompanied by an east wind blowing to the west, the weather station’s rain collector won’t be able to capture a good volume of falling rain because of the “shadow” of the nearby structure.
Here are a few things to keep in mind as far as the positioning of the rain collector is concerned:
- When positioning the rain collector, there should at least be a five feet clearance horizontally from the closest obstruction.
- If the obstruction is within five feet of the device, make sure that it’s no more than 10 feet in height.
The speed and direction of the wind are read by the weather station’s anemometer. Again, like the rain gauge, this part of the device should reflect wind patterns as if it was installed in a large, open field.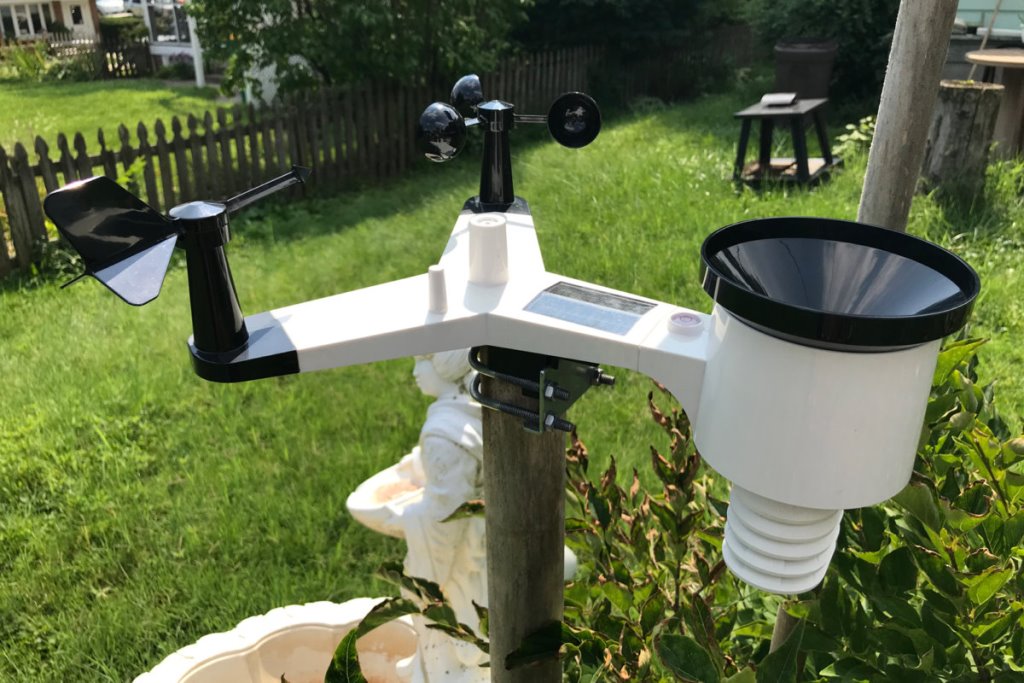
Here’s the rule of thumb when it comes to the anemometer’s placement:
- The anemometer should be placed as high above the ground as possible, like the rooftop. This is because standard wind measurement dictates that readings be taken at least 33 feet above the ground.
- Among all your weather station’s parts, the anemometer should have the highest elevation. There should be at least seven feet of vertical clearance from it and the nearest structural obstructions.
Final Thoughts
Not everything is covered in your weather station’s instruction manual. It may tell you how to install your device and give you an idea as to where to install it, but certain aspects may still escape you depending on where you live.
The purpose of the above information is to fill any of the gaps that may keep you from fully taking advantage of your personal weather station.


