
Dual showerheads are a great way to make your spa feel right in the family bathroom. Imagine how happy it would be to wake up each day in a peaceful setting with your spa shower waiting. It sounds complicated, but if the instructions are followed, the installation is quick and straightforward. Do you know how to install them? If not, let’s find out through this article.
A few basic features of dual shower heads
Dual showers are designed for those looking to add a second showerhead to their bathroom. There are different types of double batteries, depending on the needs and preferences of each person.
First, place one shower head on the wall the same way as a conventional shower head installation, with the second showerhead facing the end of the extended hand. They can be adjusted up and down, in or out.
Second, the double bar shower head positions both showerheads close to the wall and side by side. All dual shower head systems can be easily attached to your existing plumbing without any tools (a wrench may be required to remove your old showerhead).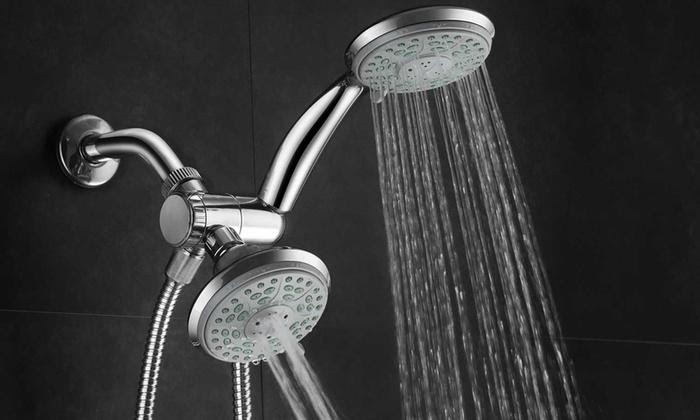
Installing two showerheads to your existing shower hose is simple and easy to do. Most people will let both heads run simultaneously, but the water flow will be reduced per head because you are separating water between them. To avoid that, you should use the flow valve on the back of the showerhead so you can control the amount of water flowing through each shower head. By doing this, you can increase the flow of water to one end so that the faucet spray more forcefully from the showerhead.
How to install a best dual shower head
In this section, I will show you how to install a complete dual shower head. The installation process is arranged in sequence according to the following steps:
- First, make sure the water is turned off.
- Remove your existing showerhead by turning it on top and hold your arm with pliers and a wrench.
- Once the old showerhead is off, remove the remaining tape so that the arm strands are clean and ready for your new showerhead. Clean up any potentially harmful rust on the pipes.
- Install the base valve. This is a small rectangular piece that will connect to both the main head and the detachable showerhead. It is also home to the switching valve.
- Ensure that you wrap the shower arm’s connecting fibers in new plumbing tape to seal it from leaks.
- Next, wrap the valve threads in the plumber’s specialty tape and attach it to the main showerhead. Make sure you tighten it up using pliers and cloth as scratch-resistant. Make sure everything is clean before proceeding.
- Finally, connect the second portable showerhead by twisting the extension cord and then fixing the nozzle. Make sure you are wrapping a large amount of plumber’s tape over each connecting thread you encounter.
- To make sure no leaks occur, turn on the water and check your showerhead.
- If a leak does occur, wrap the plumber’s tape more and tighten it.
In particular, a little advice for you is to install the diversion valve in the wall. In both cases, the showerhead and the showerhead are controlled by the same mixing valve. The difference is that the diverter valve only directs the flow of water to one shower or another. Each mixing valve operates independently from the other valve, and both shower heads (fixed showerhead or handheld showerhead) can be run at the same time.
Conclusion
Thus, installing a system consisting of a shower with a shower and a shower head seems to be quite a lot of effort and planning. However, this can be entirely ignored by the great benefits that this device brings. Imagine a hot shower relaxing after a long hard day in your bathroom. Isn’t that great?
Recommended for you:
https://hometoolsavvy.com/best-toothbrush-holder/


